Rain Garden Design: A Step-by-Step Plan for a Drier Yard
Every time it rains, water rushes off your roof, across your driveway, and straight into the street. It picks up oil, fertilizer, and dirt along the way, then dumps it all into the nearest storm drain. Your yard gets nothing out of the deal except a soggy patch by the downspout.
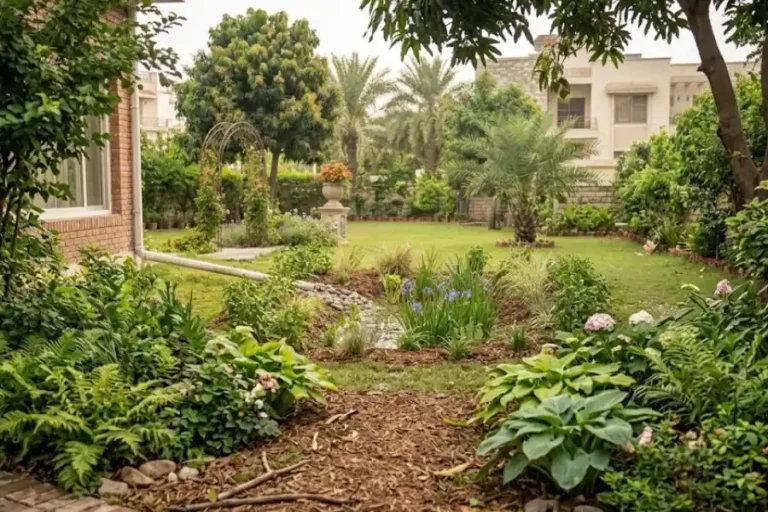
A rain garden flips that story. Instead of losing all that water, you capture it, let it soak into the ground, and grow something beautiful in the process. Good rain garden design is not complicated, but it does depend on a few details that most quick tutorials skip. This article covers all of them, in plain language, from picking the spot to picking the plants.
What Is a Rain Garden?
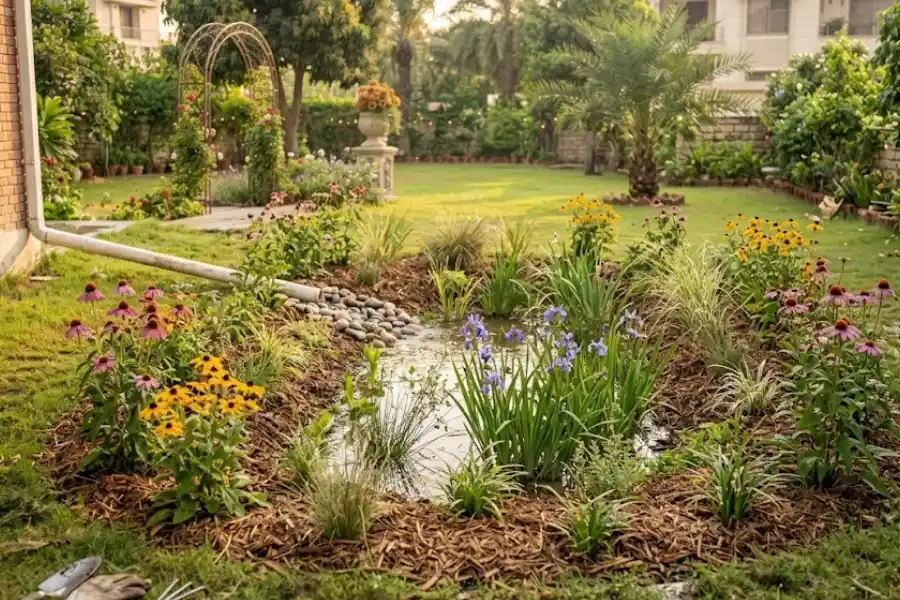
A rain garden is a shallow, bowl-shaped planting bed built in a low spot in your yard. It catches runoff from your roof, driveway, or patio and holds it just long enough for the water to soak into the soil, usually within a day.
It is not a pond. It is not a swamp. A well-planned rain garden looks dry most of the time and only fills up during and right after a storm. That is the whole point of smart rain garden design: the garden does its job quietly, then gets back to looking like a normal flower bed.
Studies from university extension programs show a rain garden can soak up around 30 percent more water than a regular patch of lawn the same size. That is a real difference during heavy storms.
Is Your Yard a Good Fit for a Rain Garden?
Before you plan anything, check these basics:
- You have a spot at least 10 feet away from your house foundation.
- The area is not directly over a septic system or buried utility line.
- The spot is not already a low, swampy area that stays wet for days.
- You have access to a downspout, driveway edge, or another source of runoff to direct into the garden.
If your yard checks these boxes, you are ready to start designing.
Step 1: Pick the Right Spot
Location is the single most important decision in rain garden design. Get this wrong, and no amount of pretty planting will fix it later.
Look for a natural low point in your yard, ideally downhill from a downspout, driveway, or patio. If that downspout currently just dumps straight onto bare soil, routing it through a decorative rain chain first gives the runoff a controlled path into the garden’s inlet instead of an eroded splash zone. The garden needs to be at least 10 feet from your home so water does not seep back toward your foundation. Stay away from tree roots, since digging near a mature tree can damage it, and steer clear of septic fields entirely.
Before you dig a single shovelful, call 811 (the national “call before you dig” number) so utility companies can mark any buried lines. This step is free, and skipping it is how people end up with a very expensive afternoon.
Step 2: Test Your Soil (Do Not Skip This)
This is the step almost everyone rushes past, and it is the reason a lot of rain gardens fail within the first year.
Dig a test hole about 10 inches deep in your chosen spot. Fill it with water and time how long it takes to drain. If it drains within 24 to 48 hours, your soil is suitable. If water is still sitting there two days later, your soil has too much clay, and you will need to either choose a different spot or mix in compost and coarse sand to improve drainage.
A rain garden built on soil that will not drain is not a rain garden. It is a mosquito pond waiting to happen.
Skipping the soil test is the top reason rain gardens turn into standing puddles instead of the fast-draining feature they are supposed to be.
Step 3: Size It Correctly
A rain garden that is too small will overflow during a heavy storm. One that is too large wastes time and money. Here is a simple formula used by several city stormwater programs:
- Add up the square footage of the hard surfaces draining into the garden (roof section, driveway, patio).
- Divide that number by 6 to 8 for a garden with average, well-draining soil.
- Divide by a smaller number, like 4 to 5, if your soil drains slowly, since you will need more surface area to handle the same amount of water.
For example, if 600 square feet of roof drains toward your garden, dividing by 6 gives you a target size of about 100 square feet. Most home rain gardens end up somewhere between 100 and 300 square feet, which is large enough to make a real difference without taking over the whole yard.
Step 4: Shape and Dig the Basin
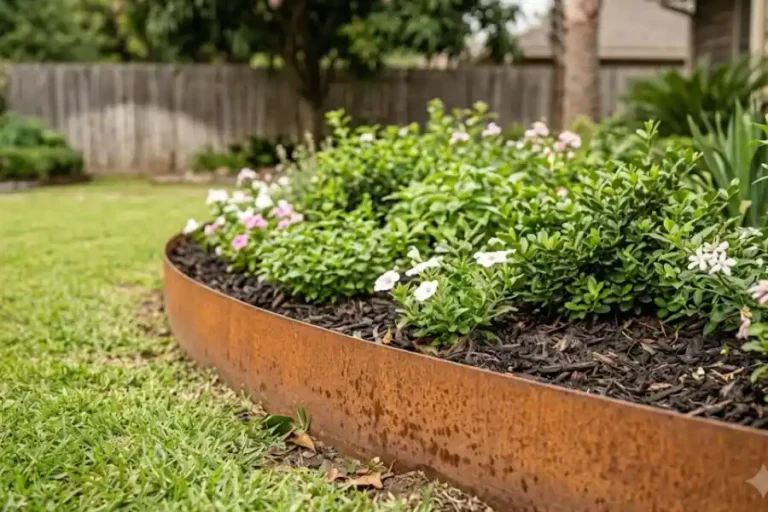
Kidney and crescent shapes look the most natural and blend well into an existing yard. A long, narrow strip works better if you are fitting the garden between a sidewalk and a fence.
Outline your shape with a garden hose or rope before you dig, so you can walk around it and adjust before committing. Dig the basin 6 to 9 inches deep with a flat bottom, not a deep bowl. Going much deeper than that does not help it hold more water long-term, and it raises safety and mosquito concerns. Use the soil you remove to build a low berm on the downhill side, which helps keep water inside the garden instead of running straight through it.
Step 5: Design the Three Moisture Zones
This is the part of rain garden design that most beginner tutorials leave out, and it is exactly why so many first-time rain gardens end up with half the plants dead within a year. A rain garden is not one uniform environment. It has three distinct zones, and each one needs different plants.
The Basin (Wettest Zone)
This is the deepest, center part of the garden. It holds water the longest after a storm, sometimes for a full day. Plants here need to tolerate both flooding and short dry spells.
The Slopes (Middle Zone)
The sides of the bowl get wet during storms but drain faster than the basin. Plants here need to handle occasional soaking without staying wet all the time.
The Berm and Edges (Driest Zone)
The outer rim rarely gets wet at all. This zone needs plants that are closer to a normal, drought-tolerant garden bed.
Getting these three zones right is what separates a rain garden that thrives for a decade from one that needs replanting every spring.
Step 6: Choose Plants for Each Zone
Native plants are almost always the best choice for rain garden design. They are used to your local rainfall patterns, they support local pollinators, and once established they need very little watering or fertilizer. A garden bird bath tucked into the drier berm zone extends that same wildlife appeal to birds, which are drawn in by the insects and seed heads the planting already attracts.
Some reliable options by zone, common across much of the U.S. (always check which are native to your specific region):
- Basin: Blue flag iris, palm sedge, swamp milkweed
- Slopes: Black-eyed Susan, joe-pye weed, switchgrass
- Berm and edges: Purple coneflower, little bluestem, butterfly weed
Mix in a few taller, woody plants like shrubs or ornamental grasses along with your flowering perennials. A garden made only of soft, floppy perennials tends to flop over and look messy by midsummer. These sturdier plants hold the design together year-round, even in winter when everything else has died back.
Step 7: Mulch and Finish the Design
Top the soil with about 2 to 3 inches of shredded hardwood mulch or compost. This holds moisture, blocks weeds, and helps the soil improve and loosen over time. Avoid loose bark chips, since they tend to float away the first time the garden fills with water.
Water new plants regularly for the first growing season while their roots establish. After that, a well-designed rain garden needs very little upkeep beyond occasional weeding and a spring cleanup.
Rain Garden Design Mistakes That Cause the Most Problems
Most rain garden failures trace back to one of these avoidable mistakes:
- Skipping the soil test. Slow-draining soil turns a rain garden into a standing puddle.
- Planting the wrong species in the wrong zone. A drought-loving plant placed in the basin will drown; a moisture-loving plant on the berm will dry out.
- Overusing decorative rock. Rock looks tidy but does not absorb water the way soil and roots do. Use it sparingly, mainly to stop erosion at the water inlet, where a bit of river rock landscaping can absorb the force of incoming water without covering up the planting area that is actually doing the work.
- Planting too sparsely. Gaps between plants invite weeds and reduce how much water the roots can soak up. Aim for a garden with no visible bare soil once it matures.
- Ignoring mature plant size. A plant that looks small in its nursery pot can triple in size within two years, crowding out its neighbors.
- No overflow path. Every rain garden needs a planned route for water to exit safely during an unusually heavy storm, instead of pooling against your foundation.
Maintenance: What to Expect Year by Year
A new rain garden needs more attention in its first year than it ever will again.
Year one: Water regularly during dry spells, pull weeds before they establish, and watch how different areas drain after storms so you can confirm your zones are working as planned. Mounting a simple rain gauge near the garden makes it easy to see exactly how much rainfall triggered a given fill level, which is a handy way to check that your sizing math holds up in real storms.
Year two and beyond: Established native plants generally need no supplemental watering except during extended drought. A yearly spring cleanup, clearing debris from the inlet, and occasional weeding is usually all it takes.
What Does Rain Garden Design Cost?
A DIY rain garden using mostly native perennials can often be built for a few hundred dollars, covering plants, mulch, and basic tools. Hiring a landscaper for a professionally designed and installed rain garden typically costs more, often running into the low thousands depending on size and site conditions.
Many cities and counties offer rebate programs that cover part of the installation cost, especially in areas focused on reducing stormwater runoff into local waterways. It is worth checking with your city’s public works or stormwater department before you budget, since these programs can meaningfully lower your total cost.
Frequently Asked Questions
Do rain gardens attract mosquitoes?
Not if they are designed correctly. Mosquitoes need standing water for about a week to breed. A properly built rain garden drains within 24 to 48 hours, which is far too fast for mosquitoes to complete their life cycle.
How big should my rain garden be?
Most residential rain gardens range from 100 to 300 square feet. The exact size depends on how much hard surface area drains into it and how well your soil absorbs water.
Can I design and build a rain garden myself?
Yes. Many homeowners build their own rain gardens over a weekend, especially smaller ones. The main steps, site selection, soil testing, sizing, and zone-based planting, do not require special equipment, just careful planning.
How long does a rain garden take to mature?
Most native perennials take two to three growing seasons to fully establish their root systems. The garden will look sparse in year one and noticeably fuller by year three.
What is the best time of year to plant a rain garden?
Spring and fall are generally the best windows, since temperatures are mild and rainfall is more consistent, which helps new plants establish without needing constant watering.
Can a rain garden replace a French drain or sump pump?
For moderate runoff, yes, a rain garden can reduce or eliminate the need for a French drain. For severe drainage problems or a high water table, it usually works best alongside other drainage solutions rather than replacing them entirely.
Final Thoughts
Good rain garden design comes down to a handful of decisions made in the right order: pick a safe location, test your soil, size the garden accurately, and match your plants to the right moisture zone. Get those four things right, and the rest of the process is closer to normal gardening than engineering.
The payoff is worth the planning. Instead of watching every storm wash pollutants toward the nearest drain, you get a garden that filters that water, supports local pollinators, and looks better every year it matures.