How to Read a Rain Gauge Correctly: Avoid the #1 Mistake
A rain gauge looks like the simplest tool in your yard. Stick it in the ground, wait for rain, look at the number. Done, right?
Not quite. Most home rain gauge readings are off by a small but real amount, and the reason has nothing to do with the gauge itself. It comes down to how you look at it. Once you know the fix, it takes about ten extra seconds and never fails you again.
This article covers what a rain gauge measures, the different types you can buy or build, the exact way to read one without error, where to place it, and how to turn your readings into real watering decisions for your lawn and garden. It’s a small, inexpensive tool, and worth having even if you’re just starting out with simple garden decor ideas for beginners and building your yard piece by piece.
What a Rain Gauge Measures
A rain gauge measures the depth of water that falls on a flat surface over a set amount of time. It does not measure volume, even though it collects a volume of water. The funnel and tube just make a tiny depth of rain easy to see and read.
So when a gauge shows 0.50 inches, it means half an inch of water fell everywhere in that area, inside the tube and out. The narrow tube simply magnifies that thin layer so your eyes can catch it.
People have tracked rainfall this way for thousands of years. Records from India and Ancient Greece go back to around 400 to 500 BCE. Korea built one of the first standardized versions during the reign of King Sejong in the 1400s. The tool has barely changed since, because the idea was already right.
The Main Types of Rain Gauges
Not every rain gauge works the same way. Picking the right type depends on what you want to do with the data.
Standard Manual Gauge
This is the classic option: a funnel that drains into a clear, marked tube. It is cheap, needs no batteries, and is what most home gardeners and citizen weather observers use. The tradeoff is that you have to walk outside and read it yourself.
Tipping Bucket Gauge
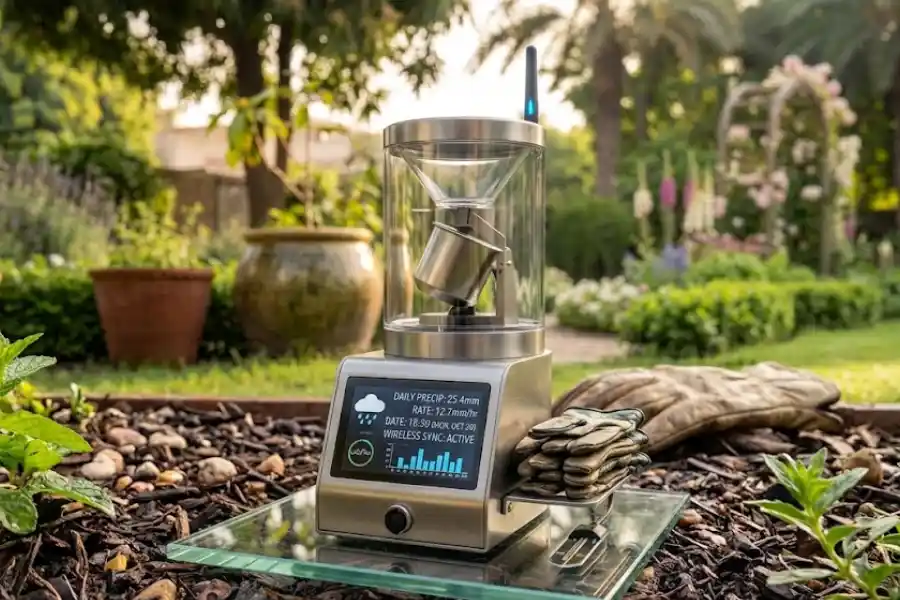
This type sits inside most home weather stations. Rain fills a tiny see-saw bucket, which tips once it hits a set amount, triggers a sensor, and resets. It logs data automatically and can show rainfall rate as well as the total. The catch: during very heavy downpours, some water is lost in the split second the bucket is mid-tip, so totals can run slightly low. It also struggles with snow unless it is heated.
Weighing Gauge
Instead of counting tips, this gauge weighs everything that lands in it. That makes it the most accurate option in heavy rain and the only common type that handles snow and hail well, since it weighs frozen precipitation directly instead of needing it to melt first. Weighing gauges cost more and are mostly used by professionals and serious weather hobbyists.
DIY Gauge
A straight-sided can, like an empty coffee or tuna can, paired with a ruler will get you a rough reading. It will not match the precision of a real gauge, but it is accurate enough to answer the question most people care about: did my garden get enough water this week?
How to Read a Rain Gauge Accurately
This is the part almost every rain gauge owner gets wrong, and it is worth slowing down for.
<blockquote> <p><strong>[IMAGE PLACEMENT]</strong></p> <p><strong>Alt text:</strong> Close-up of reading rain gauge water level at eye level</p> </blockquote>
Get to Eye Level First
Never read a gauge from above. Crouch or bend down until your eyes are level with the water inside the tube. Reading from a standing position looking down is called parallax error, and it can throw your number off by several hundredths of an inch every single time.
Read the Bottom of the Curve
Water sitting in a narrow tube does not sit flat. It forms a small curve called a meniscus, dipping slightly in the middle. Always read the measurement at the bottom of that curve, not the top edge where the water touches the sides of the tube. This one habit fixes the second most common mistake people make.
If you take away only one thing from this article, make it this: eye level, bottom of the curve. That combination is the difference between a rough guess and a real measurement.
Read It Within 24 Hours
Water sitting in an open gauge starts evaporating right after the rain stops, faster in hot or windy weather. Check and empty your gauge at the same time every day, ideally within 24 hours of a rain event, so your evaporation loss stays small and your daily totals stay consistent.
Handling Heavy Rain and Overflow
Standard gauges usually hold one inch of water in the inner measuring tube before the extra spills into an outer overflow container. If that happens, read and record the inner tube first, empty it, then carefully pour the overflow into the tube in small batches, adding each reading to your running total. Never dump both together and estimate.
Handling Snow and Ice
Frozen precipitation will not give you an accurate reading while it is still frozen. Bring a manual gauge indoors, let the snow or ice melt completely, then measure the liquid. For a faster method, add a small, known amount of warm water to speed up melting, then subtract that amount from your final total.
Where to Place Your Rain Gauge
Even a perfect reading is meaningless if the gauge is in the wrong spot. Follow these placement rules:
<blockquote> <p><strong>[IMAGE PLACEMENT]</strong></p> <p><strong>Alt text:</strong> Rain gauge placed in an open yard away from trees and walls</p> </blockquote>
- Set the top of the gauge between 2 and 5 feet above the ground. This limits both wind interference and splash-back from the ground.
- Keep it in a wide open area, away from trees, fences, roof lines, and walls. Solid objects block rain and create wind eddies that either starve or overfill the gauge.
- Avoid mounting it directly on a fence post or near a downspout, where runoff or drips can sneak in and inflate your reading.
- Keep it away from sprinkler heads unless you are intentionally measuring irrigation output.
Most gauges come with their own mount, but if yours doesn’t, driving sturdy decorative garden stakes into open soil works just as well, and they blend into the yard instead of looking like bare hardware.
Using Rain Gauge Readings in Your Garden
This is where a rain gauge stops being a curiosity and starts saving you time, water, and money.
Most lawns and garden plants need about 1 to 1.5 inches of water per week to stay healthy, a bit more if temperatures are consistently above 90°F. That water can come from rain, a sprinkler, or both combined. The trick is knowing how much rain already covered that number so you are not adding water your plants do not need.
Here is the simple math: one inch of water spread over one square foot equals about 0.62 gallons. So a 10 by 10 foot garden bed, 100 square feet, needs roughly 62 gallons a week to hit that one inch target. If your gauge shows half an inch fell overnight, you only need to make up the other half inch yourself.
You can also use a rain gauge to time your sprinkler. Set it out in the area your sprinkler covers, run the system, and check how long it takes to collect one inch of water. Once you know that number, you will never have to guess sprinkler run times again.
Keep in mind the one-inch rule is built around plants growing directly in the ground. If you’re working with pots or raised beds instead, these container garden ideas are worth a look, since potting soil dries out faster and often needs extra water even after a good rain.
Make Your Own Rain Gauge at Home
If you just want a quick answer for the garden, skip the store trip:
<blockquote> <p><strong>[IMAGE PLACEMENT]</strong></p> <p><strong>Alt text:</strong> DIY rain gauge made from a tuna can and ruler in the garden</p> </blockquote>
- Find a container with straight sides, like a tuna can or a small deli container. Avoid anything that tapers or curves, since that throws off the measurement.
- Place it in an open, flat spot in the yard, away from trees, walls, and roof runoff.
- After it rains, measure the water depth with a ruler placed straight down into the container.
- Record the number, then empty the container so it is ready for the next rain event.
This will not match the precision of a magnified measuring tube, but for deciding whether to turn the sprinkler on, it works just fine.
A homemade rain gauge isn’t the only way to bring rainfall into your yard’s design. A decorative rain chain works on a similar idea, guiding water down from the roofline into a visible, decorative path instead of a measuring tube, so you get function and style in one piece.
Common Rain Gauge Mistakes to Avoid
- Reading from above instead of at eye level (parallax error)
- Reading the top of the water curve instead of the bottom
- Leaving the gauge under a tree, near a fence, or close to a wall
- Waiting several days to check the gauge, losing water to evaporation
- Forgetting to empty the gauge, which makes the next reading meaningless
- Measuring snow or ice before it has fully melted
Frequently Asked Questions
How often should I empty my rain gauge?
Empty it every time you take a reading, ideally once a day at the same time. This keeps each measurement tied to a clear 24-hour window instead of mixing several days of rain together.
Can I really use any old container as a rain gauge?
Only if the sides are perfectly straight up and down. A can that curves or tapers will give you a wrong number, since the same amount of rain fills a narrower section faster than a wider one.
How accurate are home rain gauges?
A quality manual gauge, read correctly, can be accurate to within a hundredth of an inch. Tipping bucket gauges run a few percent low during heavy rain. A basic can and ruler is usually accurate to about an eighth of an inch, which is close enough for everyday garden decisions.
Do I still need a rain gauge if I already check a weather app?
Yes, if you care about your own yard specifically. Weather apps report rainfall for a wider area or the nearest airport station, which can differ from your actual property by a noticeable amount, especially during scattered summer storms.
What is the difference between reading in inches versus millimeters?
They measure the same thing, just in different units. The United States typically uses inches, while most other countries use millimeters. Some gauges show both scales side by side on the same tube.
Why does my gauge show less rain than my neighbor’s?
Small differences in placement explain most of this. A gauge closer to a tree, wall, or slope will collect less or more rain than one in a fully open spot, even a few yards away.